")
Years of busted ankles, soaked feet, and blistered heels taught me a lot about hiking boots. You don’t need to learn the hard way. Forget the marketing hype; let’s talk about what actually works for new hikers and how to avoid costly blunders.
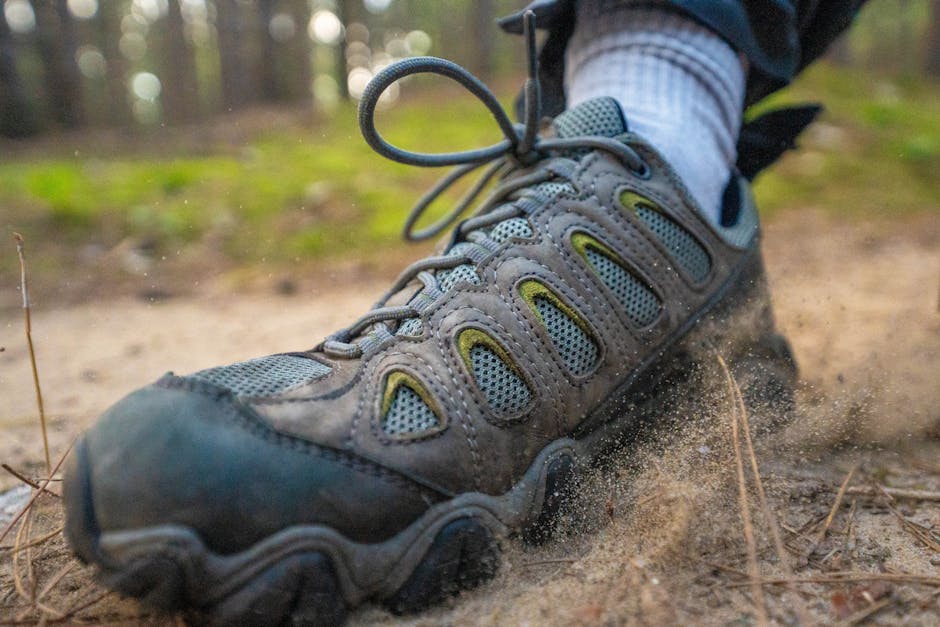
Trail Runners vs. Hiking Boots: The Real Deal
For too long, beginners have been told they absolutely need heavy, clunky boots for every single step on the trail. That’s just not true for most casual day hikes. I’ve logged hundreds of miles in both, and the truth is, a good pair of trail running shoes can be a superior choice a lot of the time. But there are still crucial situations where a proper hiking boot is the only way to go. It all depends on your terrain, your pack weight, and the weather.
When Trail Runners Win
If you’re hitting well-maintained trails, carrying a light daypack, and hiking in relatively dry conditions, trail runners are often the better option. They are lighter, more flexible, and far more breathable than traditional boots. This means less fatigue over long distances and cooler, happier feet. I’m talking about models like the **Merrell Moab Speed** or the **Salomon Sense Ride**, which offer enough grip and cushioning for most casual trails without the bulk. They shine in warmer weather and on faster-paced hikes where agility is key. Plus, they often dry out much faster if you hit a small puddle or stream.
When Boots are Non-Negotiable
Now, don’t get me wrong, there’s a time and a place for serious hiking boots. If you’re carrying a heavy pack (think overnight trips or multi-day excursions), traversing technical terrain with loose rocks and roots, or facing consistently wet and muddy conditions, boots are essential. They provide better ankle stability against twisting, superior protection from sharp debris, and more robust waterproofing. Cold weather or off-trail scrambling also calls for the durability and stiffness of a hiking boot. It’s about protecting your feet and ankles when the trail gets rough or the load gets heavy.
| Feature | Trail Running Shoes | Hiking Boots |
|---|---|---|
| Weight | Very Light (200-350g) | Moderate to Heavy (400-700g+) |
| Flexibility | High, minimal break-in | Moderate to Low, may require break-in |
| Breathability | Excellent | Good to Moderate (can be hot) |
| Waterproofing | Often minimal (quick-drying) | Usually robust (Gore-Tex options) |
| Ankle Support | Low cuff, minimal support | Mid to High cuff, good stability |
| Terrain Best For | Well-maintained trails, speed, light packs | Technical terrain, heavy packs, wet conditions |
| Typical Price Range | $110 – $160 | $140 – $220 |
Waterproofing: Don’t Fall for the Gimmick

Here’s my blunt opinion: for most casual summer or fall hiking, don’t obsess over “waterproof” boots. It’s often a marketing gimmick that leads to sweaty, uncomfortable feet. Unless you’re specifically planning to hike through prolonged rain, deep puddles, or snow, a waterproof membrane like Gore-Tex just traps moisture inside. Your feet will get wet from sweat, regardless. Focus on breathability instead, and let your feet breathe. If you truly need to stay dry in severe wet conditions, then yes, Gore-Tex is the only real answer, but know that it comes with a trade-off in ventilation.
Why Ankle Support Isn’t What You Think
This is a big one. Many beginners automatically reach for high-cut boots, believing they will completely prevent ankle sprains. While a higher cuff does offer a sense of stability, it’s not the magic bullet people imagine. I’ve seen plenty of experienced hikers sprain ankles in full-on mountaineering boots. The real benefits are often misunderstood, and focusing solely on a high cuff can distract from what truly keeps your ankles safe on the trail.
The Myth of “Preventing Sprains”
A boot’s high cuff can restrict some lateral movement, but it can’t completely prevent a severe rotational twist that causes a true ankle sprain. Those sprains happen when your foot rolls at an extreme angle, tearing ligaments. No boot, short of a ski boot, is stiff enough to fully immobilize that kind of force. Relying entirely on a boot’s height for sprain prevention can actually make your natural ankle stabilizers weaker over time. Your body’s proprioception (sense of position) and muscle strength are far more crucial for preventing those nasty rolls.
True Benefits of a Higher Cuff
So, what *does* a higher cuff do? First, it offers excellent protection from external impacts. Think about stubbing your ankle on a rock or scraping against thorny bushes – a boot cuff takes the hit instead of your skin. Second, it provides crucial stability when you’re carrying a heavy pack. The added material and stiffness help distribute the load and prevent your ankle from overworking. Third, it keeps trail debris like pebbles, dirt, and even snakes out of your boot. And finally, on long, challenging days when your muscles are fatigued, a higher cuff can offer a supportive “hug” that reduces strain and helps maintain good form, especially on uneven terrain.
Training Your Ankles
Instead of just buying the stiffest, highest boot, invest some time in strengthening your ankles. Simple exercises like calf raises, single-leg balancing, and walking on uneven surfaces (safely!) can build the crucial stability needed to prevent sprains. I’ve found that a combination of strong ankles and an appropriate boot for the terrain is the best defense. Don’t outsource all your ankle stability to your footwear.
The Fit Test: How to Avoid Blisters and Black Toes

Buying boots online without trying them on is a gamble. Your feet are unique, and what fits one person perfectly can be agony for another. The number one cause of misery on the trail is poor-fitting footwear. I’ve learned this lesson more times than I care to admit. Take your time, try them on properly, and be ruthless about fit. A few extra minutes in the store can save you days of pain on the trail.
- Go Late in the Day: Your feet swell throughout the day. Try on boots in the afternoon or evening when your feet are at their largest. This ensures a comfortable fit even after hours of hiking.
- Wear Your Hiking Socks: Bring the exact socks you plan to hike in. The thickness of your socks significantly impacts fit. Merino wool or synthetic blend socks are a must; never try boots on with thin cotton socks.
- Walk Around a Lot: Don’t just stand there. Walk on the store’s inclines and declines if they have them. Go up and down stairs. Try to mimic the motions of hiking as much as possible to identify pressure points.
Heel Lock is Crucial
Your heel should feel snug and secure in the boot, with minimal lift when you walk. If your heel is sliding up and down with every step, you’re guaranteed blisters. This is non-negotiable. Some lacing techniques, like a surgeon’s knot or a loop-lacing method at the ankle, can help achieve a better **heel lock** if you have a bit of slippage. But if the boot is fundamentally too big in the heel, no lacing trick will fix it.
Toe Room Matters More Than You Realize
When you’re walking downhill, your foot naturally slides forward in the boot. If your toes hit the front, you’ll end up with bruised, painful, or even **black toenails**. You need about a thumb’s width of space between your longest toe and the end of the boot when you’re standing with your heel pushed back. Test this by kicking the toe of the boot lightly against the floor. Your toes should not touch the front. This extra space is critical for comfort and preventing injury on descents.
My Top Picks: Actual Boots I Recommend for New Hikers
I’ve seen countless boots come and go, and some just stand the test of time for beginners because they prioritize comfort, reliability, and value. You don’t need the most expensive, expedition-grade boot to start. What you need is something that feels good, performs well on varied terrain, and won’t fall apart after a few trips. These are my go-to recommendations for anyone new to hiking.
The All-Around Workhorse: Merrell Moab 3
The Merrell Moab has been a staple for years, and for good reason. The Moab 3, the latest iteration, continues this legacy. It’s incredibly comfortable right out of the box, requiring almost no break-in. The fit is generous, and the Vibram sole offers excellent grip on most trails. It’s available in both waterproof (Gore-Tex) and non-waterproof versions, and I usually lean towards the non-waterproof for better breathability unless I know I’m facing serious wet conditions. For around $140-$160, it’s an unbeatable value for its comfort and versatility. This is the boot I recommend most often for new hikers who just want something reliable.
The Lightweight Agility King: Salomon X Ultra 4
If you’re looking for something that feels more like a trail runner but still offers the stability and protection of a boot, the Salomon X Ultra 4 is fantastic. It’s lighter and more agile than the Moab, making it great for faster hikers or those who prioritize a more athletic feel. The Quicklace system is super convenient, though some people prefer traditional laces. The grip is aggressive, and the boot feels very precise on varied terrain. It’s usually priced a bit higher, around $160-$180, but the performance justifies it for those who want that extra nimbleness.
The Wide-Foot Friend: Keen Targhee III
For those with wider feet, Keen is often the answer, and the Targhee III is their flagship hiking boot. Keen boots are known for their signature roomy toe box, which is a blessing if you find other brands too narrow. The Targhee III is durable, offers solid protection, and has a comfortable, broken-in feel relatively quickly. It’s also very waterproof with Keen.Dry technology. Expect to pay around $150-$170 for a pair. It’s a robust boot that can handle more challenging trails while keeping your toes happy.
Common Beginner Questions Answered
Stepping into the world of hiking boots can feel overwhelming with all the choices and terminology. Here are some of the most frequent questions I get from new hikers, along with my honest advice.
How much should I spend on my first pair?
You don’t need to break the bank. For your first pair of decent hiking boots, aim for a price range of $120 to $200. Anything significantly cheaper often compromises on durability, support, and quality materials, leading to quick wear-and-tear and unhappy feet. On the other hand, spending much more than $200 as a beginner usually means you’re paying for features you won’t , like specialized mountaineering capabilities. The boots I recommended above all fall comfortably within this sweet spot.
Do I need to “break in” hiking boots?
Modern hiking boots, especially those made with synthetic materials or lighter leather, require significantly less break-in time than the heavy leather boots of old. Many, like the Merrell Moab, feel comfortable right out of the box. However, it’s still wise to take them on a few shorter walks (2-3 miles) around your neighborhood or on local trails before attempting a long, strenuous hike. This allows the boots to conform to your unique foot shape and helps you identify any potential hot spots before they become full-blown blisters.
What socks should I wear?
This is critical. You absolutely must avoid cotton socks for hiking. Cotton absorbs moisture and holds it against your skin, leading to blisters, cold feet, and discomfort. Instead, invest in high-quality hiking socks made from merino wool or synthetic materials. Brands like **Darn Tough** or **Smartwool** are excellent choices. These materials wick moisture away from your skin, provide cushioning, and help regulate temperature. Proper socks are just as important as the boots themselves for foot health on the trail.
What to Absolutely Avoid Buying
Just as important as knowing what to buy is knowing what to steer clear of. Beginners often make the mistake of either overspending on unnecessary gear or trying to save too much money, only to regret it later. These two categories are guaranteed to lead to buyer’s remorse and discomfort on the trail.
Overpriced, Over-featured Mountaineering Boots
I see it all the time: someone new to hiking buys a pair of incredibly stiff, heavy-duty mountaineering boots because they look “serious.” These boots are designed for ice axes, crampons, and scaling peaks, not for your local day hike. They are incredibly uncomfortable for general trail use, offer too much stiffness, weigh a ton, and cost upwards of $300-$500. They have features you won’t use and will only make your feet miserable and your wallet lighter. Save these for when you’re actually tackling glaciers.
Cheap, Generic Brands from Big Box Stores
While I advocate for not overspending, going to the opposite extreme and buying the cheapest pair of “hiking boots” from a discount superstore is a terrible idea. These boots often lack proper ankle support, use inferior materials that fall apart quickly, and have poorly designed soles that offer minimal grip. Their waterproofing (if claimed) rarely lasts, and their cushioning is often nonexistent. You’ll end up with sore feet, blisters, and a boot that needs replacing after a few uses. You’re not saving money; you’re just wasting it on something that will fail when you need it most and could even risk injury. Good footwear is an investment in your comfort and safety.
My final word: for most new hikers, start with the Merrell Moab 3. It’s comfortable, reliable, and will handle 90% of what you throw at it without breaking the bank or requiring a week of painful break-in. Get them, try them on with good socks, and get out on the trail.


